

Gold foil nails at home

Step by Step instructions…
Click here to see a quick video I made on my Instagram showing how to complete this DIY Nail Look.
Complete your gel nails as normal (refer to my earlier blog post: ‘How to do a gel nail manicure at home’ step by step instructions here): https://cmclifestyleblog.com/blog/howtodogelnailsathome-2tgz4-aajgj-a3n45
I used this nail polish color for this look.
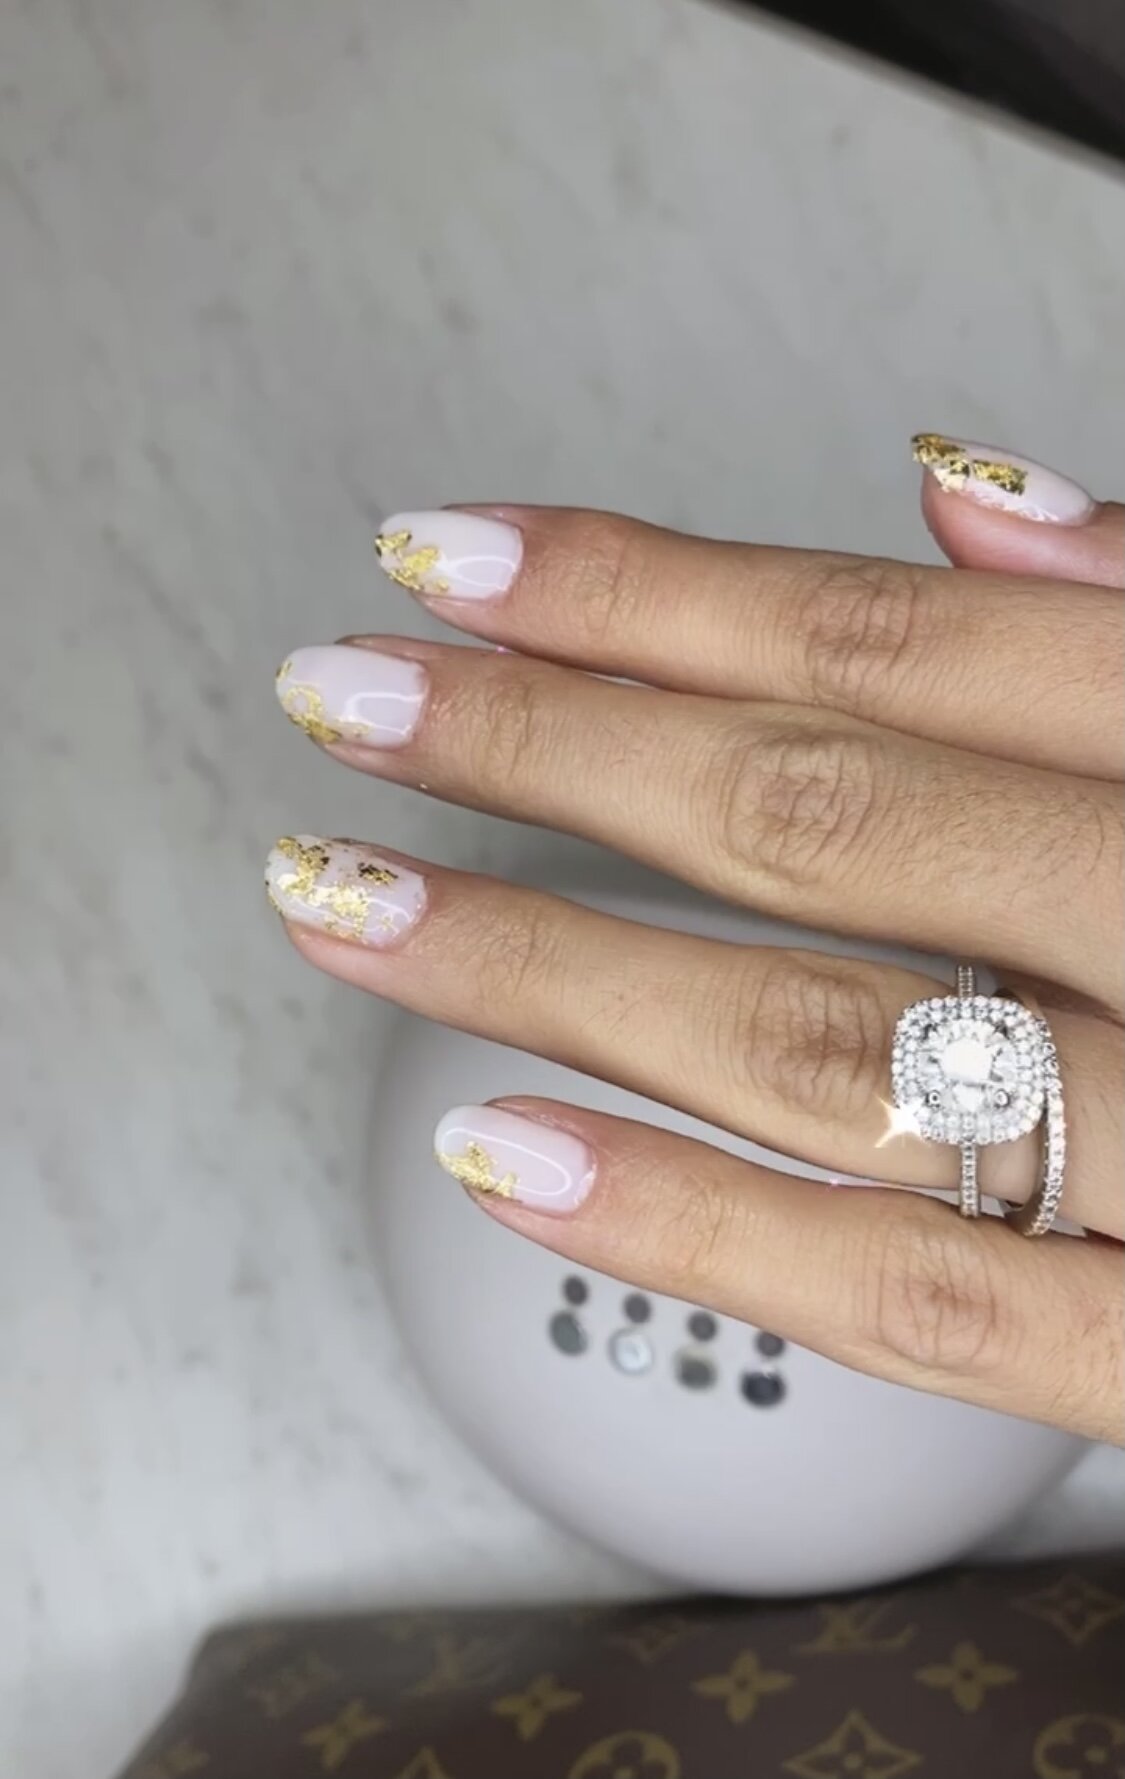
After you complete the top coat and cure it BUT before you cleanse it (the polish is still a little sticky) you apply the gold foil flecks. I found that using a tweezer helped me to break up the gold foil easier (they are very thin and easy to break). The tweezers also helped me be more precise in placing the foil on the nails.
Place the gold flecks where you want them and then use your finger to flatten it out on the nail- best you can. I found that the flatter the flecks, the better, because then the top coat seals it all in a little better. [If you want it to look more textured, you can do that too, I would just recommend applying two top coats to ensure the gold foil is sealed in fully.]
Once, the gold foil is on all of your nails, apply another top coat and cure.
Cleanse the nail using the surface cleanse on a cotton pad. I use the one included in this nail kit.
